Organic vegetable production
General guidelines and principles
by Sebastian Scott, Grasslands Trust, Zambia
Soil health
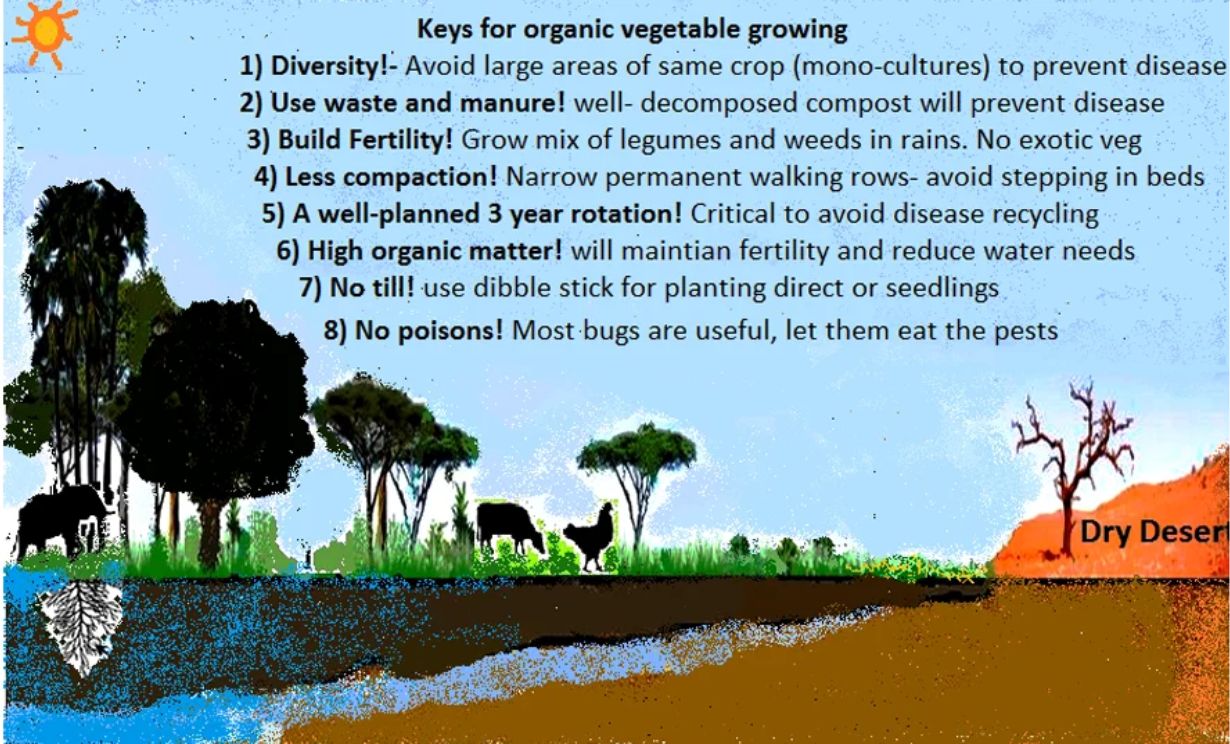
A healthy soil is needed to grow good quality organic vegetables. Healthy soil leads to healthy, disease-free plants. Soil health can be maintained by the following practices.
Use good quality compost
Vegetables are very sensitive to un-balanced availability of nutrients in the soil. The best way to supply a balanced diet for vegetable crops is by using good-quality compost. This compost should be turned at least three times and be allowed to heat up enough to kill diseases and weed seeds. Compost should always be covered to protect it from the rain and drying in the sun.
Notes on composting:
- What is composting? Bacteria, fungi and other organisms use raw organic material like grass, manure, leaves, crop residues etc. in the compost heap as food for themselves. As they consume the food, they multiply. Their waste products make compost.
- What do I need to add to my compost to make sure it is of good quality? For decomposition to occur, the organisms need a balanced food source – like other organisms, decomposing organisms need a balance of energy, protein and minerals.
- Energy foods include dry material like leaves, maize residues, dry grass and woody material.
- Protein rich material includes, manure, urine, green leaves, anything with high nitrogen content.
- Vitamins and minerals are contained in all plant material, the more diverse the material, the more minerals and vitamins. Wood ash and soil are also good sources of vitamins to add to compost.
- If a farmer has livestock, the easiest way to mix these materials together is to use dry material as bedding for the livestock. In this way, animals mix their manure and urine with the bedding.
- If there are no livestock, the farmer will have to mix all the materials together by hand. The easiest way to do this is to build a compost heap layer by layer in this order. Start with 15cm dry material, followed by 10cm green material or manure, followed by 1cm of soil or wood ash. This process is followed until the heap reaches at least 1.2m height.
- How big should my heap be? The heap should be at least 1.5m wide, 1.2m high and if you have enough materials.
- Do I need to add water? The decomposition process requires water, without water, there can be no decomposition. Use the moisture testto see if the material has enough water.
- Take a handful of the composting material and squeeze it.
- If a drop or two of water comes out, water is sufficient.
- If the material falls apart and no water comes out, it is too dry – add water.
- If more than a few drops of water come out, it’s too wet – leave heap to dry out and build again when moisture is correct.
- How do I know if the ingredients are well balanced? The heat testis another important tool for the compost maker to understand what is going on in the heap. The heat test is performed by inserting a wooden pole into the middle of the heap. The pole is taken out and touched to feel how hot it is.
- If the heap has been made properly, the inside of the heap should reach between 50 and 75 degrees Celsius within three days of making the heap. This temperature is too hot to keep your hand on the wooden pole.
- If the heap does not heat up, these could be the reasons: not enough water, not enough nitrogen-rich material, the heap is too compacted (never compact the heap).
- Should I cover my compost? Compost should always be covered for the same reasons as manure. The nutrients in compost can be lost through drying in the sun and being left in the rain. Use low-cost materials like thatching grass, a 5 cm layer of soil or plastic sheet with holes in it. Never use plastic sheet without holes as the compost will not have enough air and will not decompose properly.
- Should I mix the compost heap? Yes, occasional mixing of the compost heap helps mix the ingredients and speeds up the maturity time. However, mixing also leads to losses of some nutrients. Ideally, compost should be mixed few times as possible. Mixing 3 times can usually produce a good quality compost in 3-4 months.
- How long does compost take to make? Composting is influenced by many factors, like weather, moisture, number of times it is mixed etc. In general, a good compost will mature in 3-6 months, although this can be reduced to as little as two weeks if the compost heap is turned regularly.
- How do I know if my compost is ready? Mature compost looks like fertile soil and doesn’t smell like manure. If the compost still smells of manure or the original material can be seen, it is not ready.
General note: Boron is generally in very short supply in Zambian soils and many vegetable crops will not grow well without boron. So at least in the first years of organic production you can apply soluble boron to ensure good quality produce. * See below for Zimbabwean conditions
Green manures
Leguminous green manures should be grown in the garden during the rainy season to provide free nitrogen, organic matter and reduce pests and diseases. Good green manure crops for Zambia are red and black Sunnhemp, cow pea and velvet beans. Velvet beans can be planted with maize at the same time to give more organic matter and mulch. The best way to use the green manure is to let it grow until it flowers and then slash it back and lay it down on the surface of the soil as mulch. Crops are then planted or transplanted into this mulch.
Key points:
- When legumes are grown together with other crops, they do notgive significant amounts of nitrogen to their neighbours whilst the crops are growing together. The legume must grow, then be killed or pruned back, when the material decomposes, the nutrients are released to the other plants.
- Annual legumes move mostof the nitrogen they fix from the air and other nutrients to the seed, if seed is harvested, most of the nitrogen the legumes make is taken out of the field – a small amount may be left if all the residues remain in the field. This is not green manure.
- Green legume leaves and stem contain large amounts of nitrogen, as the leaves dry, they lose nitrogen. For this reason, dry legume leaves do not give a strong fertiliser effect on crops grown after legumes. Green leaves will give the best fertiliser response and should be added to the soil early in the cropping season for best results.
- If green manure is left on the soil surface, it maylose some nitrogen through drying. Mixing with soil can reduce nutrient losses, especially in dry areas and seasons with long dry spells.
Crop rotation
Divide the vegetable area into three sections and plan a crop rotation which allows you to grow one family of vegetables once only every three years. This helps to reduce pest and disease problems.
To help with this, the gardener must divide the garden up into either beds, or a group of beds. This makes it easy to keep a record of the crop rotation.
Some rules for crop rotation:
- Legumes should not follow Onion family.
- Keep minimum 6 months between crop susceptible to root knot nematode: Tomato, pepper, beans, carrot, beetroot. Not susceptible, onion, garlic, brassicas, potato, pea, lettuce, most herbs, green manure.
Diversity
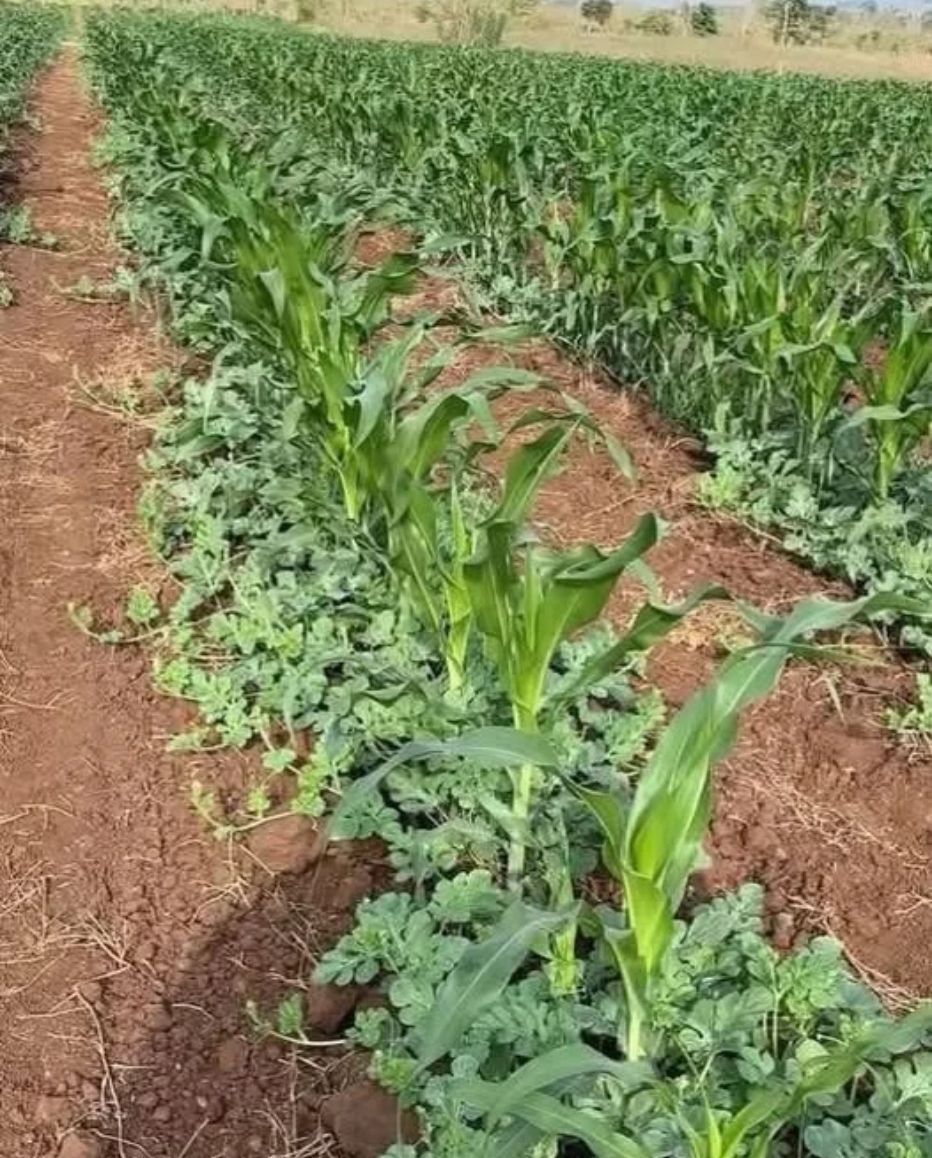
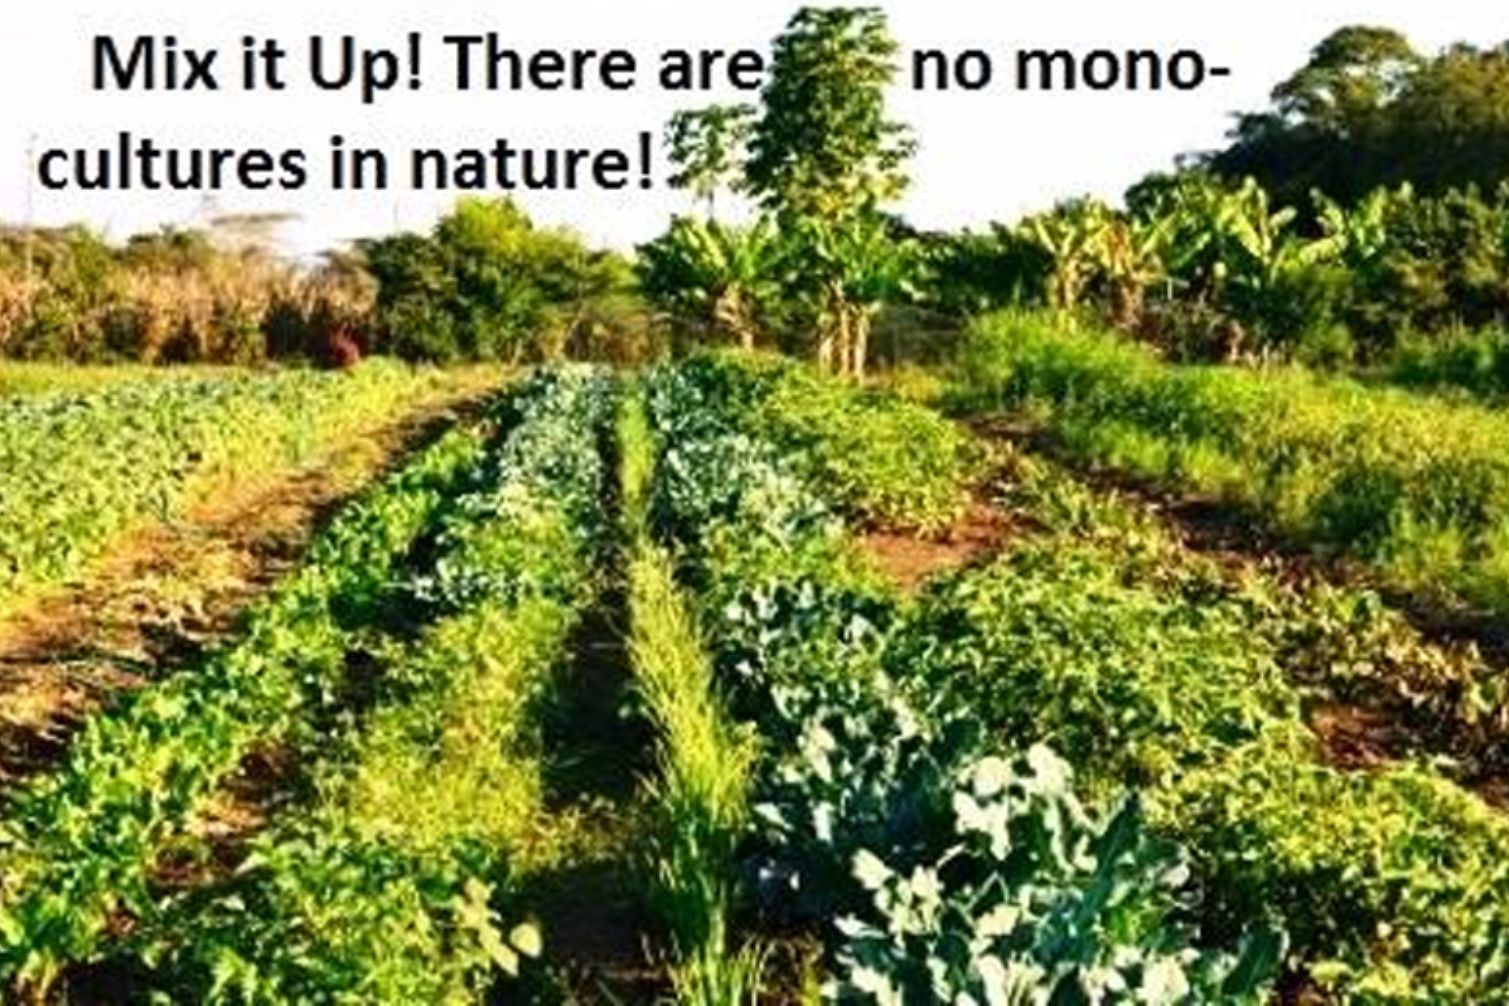
Diversity means ‘many different things’. In nature, there is never only one type of plant growing by itself, there are always many plants growing together. This diversity has many benefits. Here are some examples:
- Some crops have deep roots and some shallow, these crops can grow well together as they are not competing for the same soil nutrients. Eg. Eggplant and lettuce.
- Some crops grow tall and others short, if the short ones perform well in the shade, this means more sunlight is captured. Eg. Sweetcorn and squash
- Some crops grow quickly, whilst other take longer. Eg. Tomato and lettuce
- With well thought-out planning towards diversity, nature will create a balance of pests and things that eat them (predators) in your garden. This will minimise pest and diseases. This is good for the environment and means you spend less money on chemicals and save labour for spraying.
- Grow several different vegetables at the same time, leave a few weeds here and there and mulch the soil by growing green manures – this will lead to more diversity.
- Diversity also helps the grower to avoid too much risk. When prices for some products are good, others may be poor.
- Diversity at the market stand also helps to attract customers.
- Note on soil fertility: Boron is generally in very short supply in Zambian soils and many vegetable crops will not grow well without boron. So at least in the first years of organic production you can apply soluble boron to ensure good quality produce.
Crop protection
Under organic vegetable production, if the above principles are followed, your crops will suffer very little from pests and diseases. However, if the appropriate seasons, soil fertility and diversity principles are not followed you may have to spray your vegetables for them to produce high yields. Under the organic rules, there are a few products which are less harmful than the chemicals farmers use in conventional vegetable production. Here are the main products on the market:
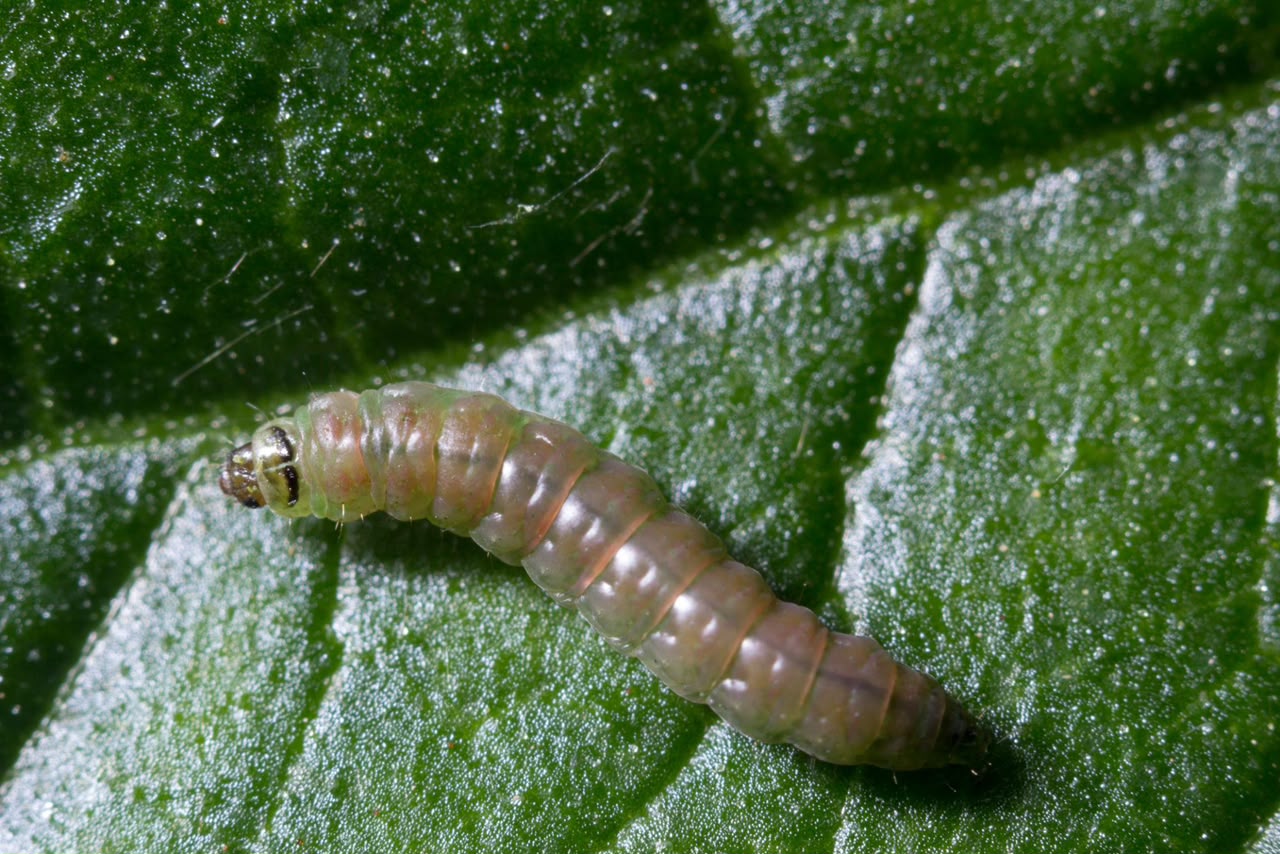
- Bacillus thurengiensis (BT var. kurstaki) – ( eg: ‘Halt’ from Osho chemicals) This is a bacteria which is sprayed on caterpillars during high pressure time such as for loopers, bollworm and Tuta Absoluta on tomatoes( October to March), stalk borer or fall armyworm on maize (September to Jan) and diamond back moth on cabbage (October to January). This product is non-toxic and works by introducing a natural bacteria which gets eaten by the caterpillars as they eat the leaves or fruit.
Once they eat the bacteria, they fall sick and die. This is very effective and is also used by conventional growers. This should be sprayed in the late afternoon as exposure to sunlight will kill the bacteria. It is also important not to apply this together with toxic sprays like copper or sulphur as this will also kill the bacteria.
- Beauveria Bassiana (Bb)- Fungus that kills many pests, but also kills beneficial insects.
- Metarhizium robertsii (Mr)- Another fungus that kills many pests, especially beetles. Also kills beneficial insects, so should be used with care.
- Wettab esulphur– This is a form of naturally occurring sulphur rock and is toxic to some fungal diseases such as powdery mildew and insects like red spider mite and thrips. One heaped tablespoon of this per 16litre sprayer should be sprayed all over the plant at the first sign of the disease or pest. Once sprayed the crop should not be eaten or harvested for 21 days.
- Copper sulphate and Copper Oxychloride– These two chemicals are strong preventative fungicides.
Only used on tomatoes in the rainy season to prevent early and late blight fungus. If you choose to grow tomatoes in the rains, the leaves and fruit of the tomatoes should be sprayer all over under and on top after every rain and/or every two weeks if there is no rain. Please note these chemicals are toxic and once sprayed, the fruits should not be harvested for consumption or sale for the next 21 days.
- Neem tree oil– This is an extract from the neem tree seed. It is used in the control of various insects including aphids, thrips and various caterpillar species. This can be bought from OSHO chemicals.
Follow guidelines for each pest as indicated on the bottle.
- There are many other organic sprays which can be bought or made from plants and seeds. However, we generally don’t need to use these as we follow the management principles outlined in this guide to prevent problems occurring.
Use disease resistant varieties where possible for organic production. Disease resistance is usually indicated by the seed seller and by experimentation by the farmer.
Specific guidelines for vegetable families:
Alliums
Onion
Planting preparation: Onion can be direct seeded, grown in the nursery as ‘bare-root’ seedlings or in seedling plugs.
Varieties: Onion comes in ‘Early’, ‘Medium’ and ‘Late’ varieties for White, Brown and Red onion. Earlies are ready in as little as 120 days from planting. Late varieties can take as long as 200 days. Note that transplanting shock from ‘bare root’ seedlings sets onion back up to 3 weeks (21 days) and up to 7 days in plugs. Maturity should be considered when selecting different varieties and planting times.
Planting dates: Dry onion – according to maturity period, aim to harvest onion between June and September as October heat makes drying onions difficult. Green onion – Aim to plant any time after 1st January and have last harvests in December.
Land preparation: Prepare beds for onion before end of Feb – For direct seeding, at least 3 cultivations with weeding hoe before planting onion to reduce weed pressure. Do not sub soil as onion enjoys firm soil.
Spacing: Depends on customer preference and planting method. Onion can be grown as single plants or in groups of up to 5 in one station. Single planting will give better yields and uniform shaped bulbs but are more labour intensive to weed. Bunches can give misshapen bulbs but are easy to weed. 25-40cm between rows makes it easy to cultivate between rows with hand tools. Small bulbs 30 per metre of row. Medium bulbs, 20 per metre, large bulbs 10 per metre.
Fertility: Onion is a medium feeder. Apply compost at the rate of 6-8 20-litre buckets of compost per 2 rows, 100 metres long. Apply compost as top dressing at half this rate when plants are 20cm tall. Do not use manure as this will lead to very big leaves and small bulbs that do not store well. Spray Boron at the rate of one heaped tablespoon per sprayer after 3 weeks and again at 6 weeks after planting.
Pest control: The only major pest of onion is thrips. Spray with wettable sulphur at 5 weeks after planting and again at 9 weeks. Check for this pest before spraying.
Disease control: 3-year rotation and don’t over-water.
Irrigation: Keep soil wet until all the onions have germinated. Weed early. Apply 30mm of irrigation per week during cold weather and 50mm during hot weather. Apply more water during bulbing. Reduce water when plants tops bend over by themselves.
Harvest and storage: Pull green onion when ready. For dry onion, pull bulbs when the tops are dry. Dry the bulbs in the field for one day only in hot weather to avoid sun burn damage. Cure onions to make sure they have time to dry slowly. This can be done in the shade of a tree or under grass. Store only good bulbs in the shed as poor bulbs will cause rot of the other onions. Hanging bulbs above the ground or on racks can increase the storage times of onion.
Garlic
Planting preparation: Prepare beds for onion before end of March Last planting date for garlic is 15th April.
At least 1 weeding with weeding hoe before planting garlic to reduce weed competition with young garlic.
Do not sub soil unless soil is very compacted. Garlic likes being mulched as this lowers soil temperatures and increases bulb size. Mulch can be applied after planting or when the plants get to 20cm in height. Break garlic bulbs into individual cloves. Only plant big cloves.
Spacing: 30-50cm between rows. 10-15cm between plants for big bulbs.
Fertility: Garlic is a heavy feeder. Apply compost as basal at the rate of 4-5 buckets per 100 metre row. Apply half the rate of compost as a top dressing at 5 weeks after planting. Spray Boron at the rate of 20g per 16-litre sprayer after 2 weeks, 4 weeks and again at 6 weeks after planting.
Pest control: The only pest of garlic is thrips. Spray with wettable sulphur at 3 weeks after planting and again at 6 weeks. Check for this pest before spraying.
Disease control: 3-year rotation and don’t over-water early in the growing season.
Irrigation: Keep soil wet until all the garlic has germinated. Weed early. Apply 30mm of irrigation per week during cold weather and 50mm during hot weather. Apply more water during bulbing. Reduce water before harvest when the plants are mature.
Harvest and storage: Pull bulbs when before the tops are dry and make plaits with them – much more money. Dry the bulbs in the field for one day only in hot weather to avoid sun burn damage. Store only good bulbs in the shed, hanging from strings.
Leek
As for onion but only 3 cm between plants and give plants some soil when they are big enough to make the white stem longer. Can also be grown throughout the year.
Asteraceae
Carrot
Planting preparation: Prepare beds with at least 3 weedings with weeding hoe before planting. Sub soil before weeding.
Spacing: 25-30cm rows – 4-5cm between plants after thinning. Please do this early and properly!
Fertility: Carrot is a light feeder. Spay Boron at the rate of one heaped tablespoon per sprayer after 3 weeks and again at 6 weeks after planting.
Pest control: No pests
Disease control: 3-year rotation and don’t over-water. Plant on ridges in the rainy season to allow for good drainage. Allow for wide spacing during the rains as the fungal leaf disease ‘Altenaria’ can reduce yields in wet and warm conditions.
Irrigation: Keep soil wet until all the carrots have germinated. Weed early. Apply 30mm of irrigation per week during cold weather and 50mm during hot weather.
Harvest and storage: Pull when ready.
Solenaceae
Tomato
Seedlings: Grow seedlings for in a fertile seed bed or trays. If grown in a seed bed the seed bed should not be near and other Solenaceae family plants to reduce pests and diseases. Also, there should not have been any Solenaceae family crops in that soil for at least 3 years. Do not press soil or compost too hard around the stem as this may lead to stem damage.
Planting preparation: Best grown after good green manure and planted with some compost into the mulch.
Otherwise, clear bed and make holes 30-50cm apart in the row and fill each hole with a double handful of good compost. Have trellis up before planting to ensure the tomatoes are in a straight line. This will make trellis management easier.
Spacing: Depending on variety. 90-180cm rows – 15-30cm between plants.
Pruning: Depending on variety.
Fertility: Tomato is a heavy feeder. Spray Boron at the rate of one heaped tablespoon per sprayer after 3 weeks and again at 6 weeks after planting. Top dress with compost before flowering using wood ashes mixed with manure. Cover with soil to make a small ridge.
Pest control: The three main pests of tomato are red spider mite, nematodes and caterpillars such as Tuta or tomato loopers.
Loopers must be controlled before they enter the fruit otherwise control is impossible. Use BT after checking for presence of this pest. Usually only a problem from Sept –March but do check for signs of damage.
Red spider usually appears only during hot-dry weather. Can be controlled with careful irrigation with the aim of keeping the plant leaves moist for long enough to disrupt red spider mite reproduction and growth.
Molasses can also be sprayed onto the tomato plant at the rate of 1% or 10ml per litre. This must be done every week in the late dry season to avoid outbreaks.
Nematodes can only be controlled by rotation and addition of organic matter to the soil in the form of green manure, compost and crop residues.
Disease control: 3-year rotation and don’t over water. When correctly managed, tomato should only suffer from two fungal diseases – early and late blight.
Early blight usually occurs during hot, humid weather so can be a problem from the beginning of the rains to February.
Late blight usually occurs during cooler temperatures and can be a problem from Feb-June. Although both diseases are common during the rains –poor irrigation management can also lead to these diseases being a problem in the dry season. As a rule, if you are not trying to control red spider mite- irrigation should be done from between 8 and 15 hrs. It is possible to grow organic tomatoes in the rains, but you will have to spray the chemical copper oxychloride (this is allowed for organic farmers if you do not sell the produce before the specified withholding period – 21 days) with a full coverage of the whole plant after every rain. It is recommended to plant organic tomatoes from Feb for the early crop to July-August for the late crop.
Disease resistant hybrid varieties are available and should be used if possible.
Irrigation: Tomatoes benefit from good water followed by a dry spell during growth but require continuous soil moisture during fruiting to avoid fruit cracking. Don’t water too early in the morning or before the leaves have dried as fungus problems may occur.
Harvest and storage: Pick when ‘blush’(just turning red) and store in the shed to avoid bird attack.
Potato
Planting preparation: Best grown after good green manure and planted with some compost into the mulch.
Otherwise, clear bed and make holes 30-40cm apart in the row and fill each hole with a double handful of good compost. Make sure holes are deep enough so the potato is planted onto the compost and the top of the potato is at least 15cm under the ground. Plant for March to Sept.
Spacing: 75-90cm rows – 30-40cm between plants.
Fertility: Potato is a heavy feeder. Spray Boron at the rate of one heaped tablespoon per sprayer after 3 weeks and again at 6 weeks after planting. Top dress with manure and wood ash during ridging – around 4-6weeks.
Pest control: The three main pests of potato are red spider mite, nematodes and tuber moth (caterpillars).
Tuber moths lay their eggs on the cracks in the soil around the potato. Therefore, to control this pest making sure the soil doesn’t dry out and crack is very important. Mulch is also effective in controlling this pest. Red spider usually appears only during hot-dry weather. Can be controlled with careful irrigation with the aim of keeping the plant leaves moist for long enough to disrupt red spider mite reproduction and growth. Molasses can also be sprayed onto the tomato plant at the rate of 1% or 10ml per litre. This must be done every week in the late dry season to avoid outbreaks. Nematodes can only be controlled by rotation and addition of organic matter to the soil in the form of green manure, compost and crop residues.
Disease control: 3-year rotation. Follow the season and irrigation guidelines for tomato. Potatoes also suffer from many viruses so only plant certified seed and make sure you don’t leave potatoes growing after the harvest.
Irrigation: Potatoes benefit from good water followed by a dry spell, during growth, but require a lot of moisture during fruiting to achieve good yields. Don’t water too early in the morning or before the leaves have dried as this will encourage fungal diseases.
Harvest and storage: Pick when ready.
Impwa and Eggplant
(Editor: Impwa is an African eggplant, also known as African garden egg or African eggplant (Solanum aethiopicum). It is a traditional vegetable widely eaten in Zimbabwe and other parts of southern and eastern Africa. The plant produces small, often rounded or slightly elongated fruits that may be green, white, yellow or reddish, depending on the variety. Impwa is grouped with eggplant, or aubergine, under the Solanum family. They are related, but impwa is not exactly the same vegetable as the familiar large, purple aubergine.)
Planting preparation: Best grown after good green manure and planted with some compost into the mulch.
Otherwise, clear bed and make holes 50cm apart in the row and fill each hole with a double handful of good compost. Plant in September.
Spacing: 90cm rows – 50cm between plants.
Fertility: Impwa is a heavy feeder. Spray Boron at the rate of one heaped tablespoon per sprayer after 3 weeks and again at 6 weeks after planting. Top dress with manure and wood ash every month after fruiting begins at the rate of one handful per plant.
Pest control: The three main pests of Impwa are red spider mite, nematodes and the 28-spotted ladybird.
Red spider usually appears only during hot-dry weather. Can be controlled with careful irrigation with the aim of keeping the plant leaves moist for long enough to disrupt red spider mite reproduction and growth.
Molasses can also be sprayed onto the plants at the rate of 1% or 10ml per litre. This must be done every week in the late dry season to avoid outbreaks. Nematodes can only be controlled by rotation and addition of organic matter to the soil in the form of green manure, compost and crop residues. The 28-spotted ladybird eats leaves and damages fruit. This pest usually occurs in the rainy season and regular checking and hand picking of the insects can give good control.
Disease control: Verticillium wilt, caused by a bacteria. This disease infects the sap flow in the plant and leads to wilting leaves and poor growth and yield. These bacteria survive for long periods in the soil. Crop rotations of at least 3 years between members of the same family can reduce infestation but rotations may need to be longer. Use resistant varieties.
Irrigation: Maintain moisture during fruiting.
Harvest and storage: Harvest twice a week and prune off all over mature fruit – if this is not done the plants will stop producing flowers and yield will be reduced.
Green pepper
Seedlings: as for tomato, but do not bury the stem with soil as this leads to death of the plants. Plant the seedling at the same depth as it was growing in the seedbed or tray.
Planting preparation: Best grown after good green manure and planted with some compost into the mulch.
Otherwise, clear bed and make holes 50cm apart in the row and fill each hole with a double handful of good compost. Plant in September.
Spacing: Staggered double row on 90cm centres – 50cm between plants.
Fertility: Pepper is a medium feeder. Spray Boron at the rate of one heaped tablespoon per sprayer after 3 weeks and again at 6 weeks after planting. Top dress with compost and wood ash every month after fruiting begins at the rate of one handful per plant.
Pest control: The two main pests of pepper are red spider mite and nematodes. Red spider usually appears only during hot-dry weather. Can be controlled with careful irrigation with the aim of keeping the plant leaves moist for long enough to disrupt red spider mite reproduction and growth. Molasses can also be sprayed onto the tomato plant at the rate of 2% or 20ml per litre. This must be done every week in the late dry season to avoid outbreaks. Nematodes can only be controlled by rotation and addition of organic matter to the soil in the form of green manure, compost and crop residues.
Disease control: The virus tobacco mosaic virus (TMV) is a major disease of this crop. It is spread through seed and between plants by aphids. It can also be spread by humans through touching uninfected plants after touching an infected plant. It is therefore advisable to reduce touching of plants as much as possible.
Resistant varieties are also available.
Irrigation: Maintain moisture during fruiting.
Harvest and storage: Harvest once or twice a week.
Brassica
Cabbage
Planting preparation: Best grown after good green manure and planted with some compost into the mulch.
Otherwise, clear bed and make holes with dibble stick 30cm apart in the row and transplant with good compost. Plant all year round.
Spacing: Staggered double rows on 90cm centres – 40cm between plants.
Fertility: Cabbage is a heavy feeder. Spray Boron at the rate of one heaped tablespoon per sprayer after 3 weeks and again at 6 weeks after planting. Top dress with manure and wood ash once before heading begins at the rate of one handful per plant.
Pest control: The main pest of cabbage is the diamond back moth. This caterpillar usually occurs from September to Jan. This pest can completely kill seedlings and maturing cabbages. Control this pest with applications of BT every week.
Disease control: No common diseases under 3-year rotation and good general management.
Irrigation: Maintain moisture during fruiting, but do not over water as this leads to head cracking.
Harvest and storage: Harvest when ready.
Broccoli
Planting preparation: Best grown after good green manure and planted with some compost into the mulch.
Otherwise, clear bed and make holes 30-40cm apart in the row and transplant with good compost. Plant from February to August only.
Spacing: Staggered double rows on 90cm centres – 30-50cm between plants.
Fertility: Broccoli is a heavy feeder. Spray Boron at the rate of one heaped tablespoon per sprayer after 3 weeks and again at 6 weeks after planting. Top dress with manure and wood ash 4 weeks after transplanting at the rate of one handful per plant.
Pest control: The main pest of broccoli is the diamond back moth. This caterpillar usually occurs from September to Jan. This pest can completely kill seedlings and maturing cabbages. Control this pest with applications of BT every week.
Disease control: No common diseases under 3-year rotation and good general management.
Irrigation: Maintain moisture during fruiting.
Harvest and storage: Harvest when ready.
Leguminaceae
Green beans
Planting preparation: Best grown after good green manure and planted with some compost into the mulch.
Otherwise, clear bed and make holes with dibble stick 30cm apart in the row and cover with good compost.
Plant from August to April only every month.
Spacing: Staggered double rows on 90cm centres – 30cm between holes 3 seeds per hole.
Fertility: Beans are a medium feeder. Spray Boron at the rate of one heaped tablespoon per sprayer after 3 weeks and again at 6 weeks after planting. Top dress with manure and wood ash 4 weeks after planting at the rate of one bucket of compost per line.
Pest control: The four main pests of beans are the red spider mite, nematodes, flower thrips and blister beetles. Red spider usually appears only during hot-dry weather. Can be controlled with careful irrigation with the aim of keeping the plant leaves moist for long enough to disrupt red spider mite reproduction and growth. Molasses can also be sprayed onto the plant at the rate of 1% or 10ml per litre. This must be done every week in the late dry season to avoid outbreaks. Nematodes can only be controlled by rotation and addition of organic matter to the soil in the form of green manure, compost and crop residues. Flower thrips live in and around the flowers of the beans and can be controlled by wettable sulphur at the rate of one heaped tablespoon per sprayer, sprayed when the flowers emerge and then once again just before the beans emerge from the flower. Do not spray the beans when they are out of the flower. Blister beetles can be controlled through hand picking and crushing every day or two.
Disease control: No common diseases under 3-year rotation and good general management.
Irrigation: Maintain moisture during fruiting.
Harvest and storage: Harvest when ready and prune off all over-mature fruit – if this is not done the plants will stop producing flowers and yield will be reduced.
Chenopodeaceae
Beetroot
Planting preparation: Clear bed and make holes with dibble stick 15cm apart in the row and cover with good compost. Plant from Feb to Oct only every month.
Spacing: Staggered triple rows on 90cm centres – 15cm between holes 2 seeds per hole. Thin to four plants per station during weeding.
Fertility: Beetroot are a medium feeder. Spray Boron at the rate of one heaped tablespoon per sprayer after 3 weeks and again at 6 weeks after planting. Top dress with manure and wood ash 4 weeks after planting at the rate of one bucket of compost per line.
Pest control: Beet army worm, a caterpillar which devastates the leaves . This pest usually occurs from September to November. Monitor the plants closely during this time and spray BT at the first sign of this pest.
Disease control: Leaf spot in the rains – don’t plant in the rains, disease resistant varieties are available.
Irrigation: Maintain moisture during fruiting.
Harvest and storage: Harvest when ready.
Spinach (Swiss chard)
Planting preparation: Clear bed and make holes with dibble stick 15cm apart in the row and cover with good compost. Plant from Feb to Oct only every month.
Spacing: Staggered triple rows on 90cm centres – 15cm between holes 2 seeds per hole. Thin to four plants per station during weeding.
Disease control: Leaf spot in the rains – don’t plant in the rains.
Irrigation: Maintain moisture during fruiting.
Harvest and storage: Harvest when ready.
Cucurbitaceae
Butternut squash
Planting preparation: Plant after onion and garlic. Clear bed and make holes with dibble stick 30cm apart in the row and cover with good compost. Plant before August 15th.
Spacing: Rows on 90cm centres – 30cm between holes 3 seeds per hole.
Fertility: Cucurbits are a medium feeder. Spray Boron at the rate of one heaped tablespoon per sprayer after 6 weeks after planting. Top dress with manure and wood ash 4 weeks after planting at the rate of one handful per station.
Pest control: The two pests of cucurbits are cucumber fly and the pumpkin beetle. This pest usually occurs from September to November. There is no organic control for these pests and time of planting is crucial for successful production of all cucurbits. To minimise damage, baby marrow can be planted 2-3weeks after butternut on the edges of the butternut crop to draw the pests away from the butternut squash.
Disease control: Powdery mildew the fungal leaf disease can be prevented by watering with sprinkler irrigation twice per week.
Irrigation: Allow butternut to dry out just before flowering to stress the plant – this leads to increased flower production. After flowering maintain soil moisture until maturity.
Harvest and storage: Harvest when fruit is yellow with no green colour or strips on the fruit.
Cucumber
Planting preparation: Mulch is very beneficial for all cucurbits. Clear rows and make holes 30cm apart in the row and cover with good compost. Plant before August 15th.
Spacing: Rows on 90cm centres – 30cm between holes 3 seeds per hole.
Fertility: Cucurbits are medium feeders. Spray Boron at the rate of one heaped tablespoon per sprayer after 6 weeks after planting. Top dress with manure and wood ash 4 weeks after planting at the rate of one handful per station.
Pest control: The cucumber fly usually occurs from October to May. There is no organic control for these pests and time of planting is crucial for successful production of all cucurbits. The pumpkin beetle transmits cucumber mosaic virus and should be controlled using wood ash applied to the leaves as needed until beetles disappear.
Disease control: Powdery mildew the fungal leaf disease can be prevented by watering with sprinkler irrigation twice per week.
Irrigation: Maintain soil moisture as cucumber are very sensitive to moisture stress.
Harvest and storage: Harvest before fruit get too big.
Malvaceae
Okra
Planting preparation: Clear rows and make holes with dibble stick 25cm apart in the row and 2cm deep - cover with good compost. Plant from August 15th – March 15th.
Spacing: Rows on 90cm centres – 25cm between holes 3 seeds per hole.
Fertility: Okra is a medium feeder. Spray Boron at the rate of one heaped tablespoon per sprayer after 5 weeks after planting. Top dress with manure and wood ash 4 weeks after planting at the rate of one handful per station.
Pest control: The two pests of okra are brown beetle and the blister beetle. The brown leaf beetle usually occurs from August to November and is only a concern during early seedling growth. Control of this pest is difficult but Tephrosia volgii is an option. Blister beetle must be hand-picked every few days and crushed.
Disease control: Powdery mildew the fungal leaf disease can be prevented by watering with sprinkler irrigation twice per week or application of wettable sulphur at the rate of one heaped tablespoon per sprayer every two weeks. The chemical must not be sprayed during fruiting and a 14-day withholding period should always be observed.
Irrigation: Maintain soil moisture especially during fruiting.
Harvest and storage: Harvest twice a week before fruit get too big.
Note for Zimbabwean farmers
This guide was originally prepared with Zambian farming conditions in mind. Its general principles of organic vegetable production, soil health, composting, crop rotation and integrated pest management may also be useful in Zimbabwe, but recommendations should be adapted to local conditions. Planting dates, crop varieties, rainfall patterns, irrigation requirements and pest and disease pressures differ across Zimbabwe’s agro-ecological regions; farmers should use locally appropriate guidance and adjust the recommendations to their own area.
Particular care is needed with boron. Boron deficiency can occur in Zimbabwean soils, but levels vary considerably by soil type and location, so it should not be assumed that all soils are deficient. Boron is essential for plant growth, but the margin between deficiency and toxicity can be narrow. Do not apply soluble boron routinely or use the spray rates listed in this guide without first confirming that it is needed and checking the appropriate rate. Where possible, obtain a soil test and seek advice from an agricultural extension officer or qualified agronomist.
Before using any crop-protection product mentioned in the guide, check that it is registered and approved for the intended crop and use in Zimbabwe. Follow the product label, including application rates, protective measures and pre-harvest or withholding periods. Product names and availability may also differ between countries.
Disclaimer:
The material in this guide does not make the author liable in any way for any actions resulting from any of the information put forward.
A note about the author: Sebastian Scott is a Zambian conservation and regenerative farmer who has spent much of his career developing practical, low-cost farming methods for small-scale farmers.
Scott leads the Grassroots Trust demonstration farm in Kafue. His work focuses on helping farmers improve soil health, recycle nutrients, integrate crops and livestock, and produce food with fewer purchased inputs.
He previously established Old Orchard Organic Farm in Kafue, where he developed and tested organic vegetable production and other mixed-farming systems. The farm also served as a practical learning centre for farmers and students.
Scott has practical farming and demonstration experience, rather than simply writing from theory. That makes the guide a useful starting point. However, it was developed around Zambian conditions, so recommendations involving soil nutrients, crop varieties, planting dates and pest management should be checked against Zimbabwean conditions before publication or use.

Related Content